This is a binary text classification project. I used pytorch to create the model with help of tez wrapper. Then used FastApi to deploy the model. The model.bin file couldn’t be uploaded due to it’s huge file, but you can run the project and create your own model.
There are two ways to run this model. Either you can train the model on colab or train it locally. If you want to run it in colab then just copy past the whole code written in NLP_Model.py. Before running it you’ll have to execute two commands. These are
!pip install tez
!pip install transformers
Then you can train your model. And if you want to train locally then you’ll have to do the followings.
Open anaconda powershell or CMD
cd 'Path to cloned repo'
conda install pytorch torchvision torchaudio cudatoolkit=10.1 -c pytorch
pip install tez
pip install transformers
pip install fastapi #webframwork
pip install uvicorn #server framwork
python NLP_Model.py
Then your model will start training. If your GPU has lower then 8GB of VRAM then you’ll run into CUDA out of memory error. To solve this open NLP_Model.py locate to model.fit() parameters and set train_bs=64 to train_bs=16 if you still face issue then again lower it to 8. For this case it is recommended to train in colab. After that you can download the model.bin file and put it in logs directory.
After the training finishes you’ll need to use FastApi to see it in web end. Considering you are still in that repo directory type in the following commands
uvicorn api:app --reload
After typing this you’ll see the followings.
[32mINFO[0m: Uvicorn running on [1mhttp://127.0.0.1:8000[0m (Press CTRL+C to quit)
[32mINFO[0m: Started reloader process [[36m[1m17612[0m] using [36m[1mstatreload[0m
INFO: Started server process [7452]
INFO: Waiting for application startup.
INFO: Application startup complete.
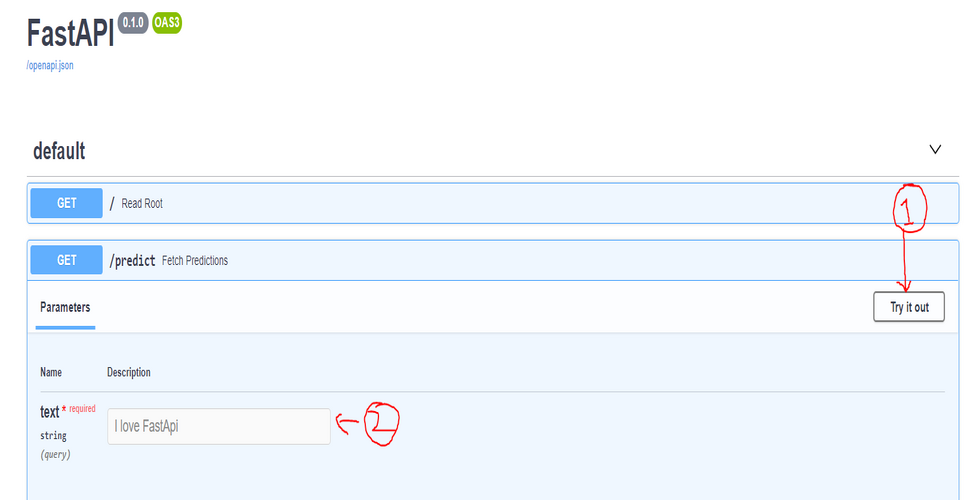
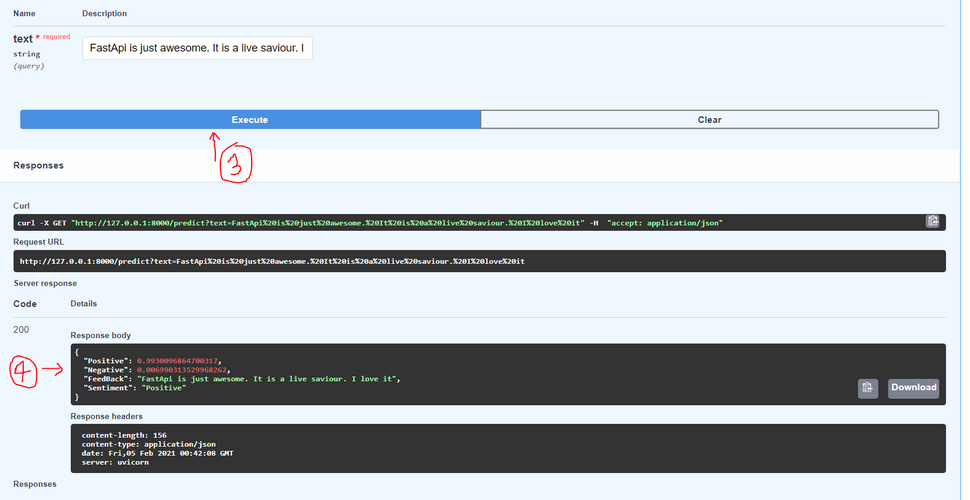
Now just copy the link and add /docs in the end ex: http://127.0.0.1:8000/docs then paste it in browser you’ll be able to see the swagger UI. It will open the following page below. Click on Try it out(1) then you’ll be able to put text in the text box(2) Then you click Execute(3) thus you’ll be able to see results in response body(4) section.